Thinking About Decorative Concrete? Here's the Lowdown.
So, you're looking at decorative concrete for your home here in Bothell. Maybe you've seen a cool stamped patio in the Queensgate neighborhood, or a polished floor in a friend's basement, and you're wondering if it's right for you. It's a great way to add character and value, but it's not a one-size-fits-all solution. Let's talk about what you need to know before, during, and after the project.
Before You Start: Planning and Reality Checks
This is where most of the heavy lifting happens, even before any concrete gets mixed. You've got to figure out what you want and, more importantly, what's actually possible.
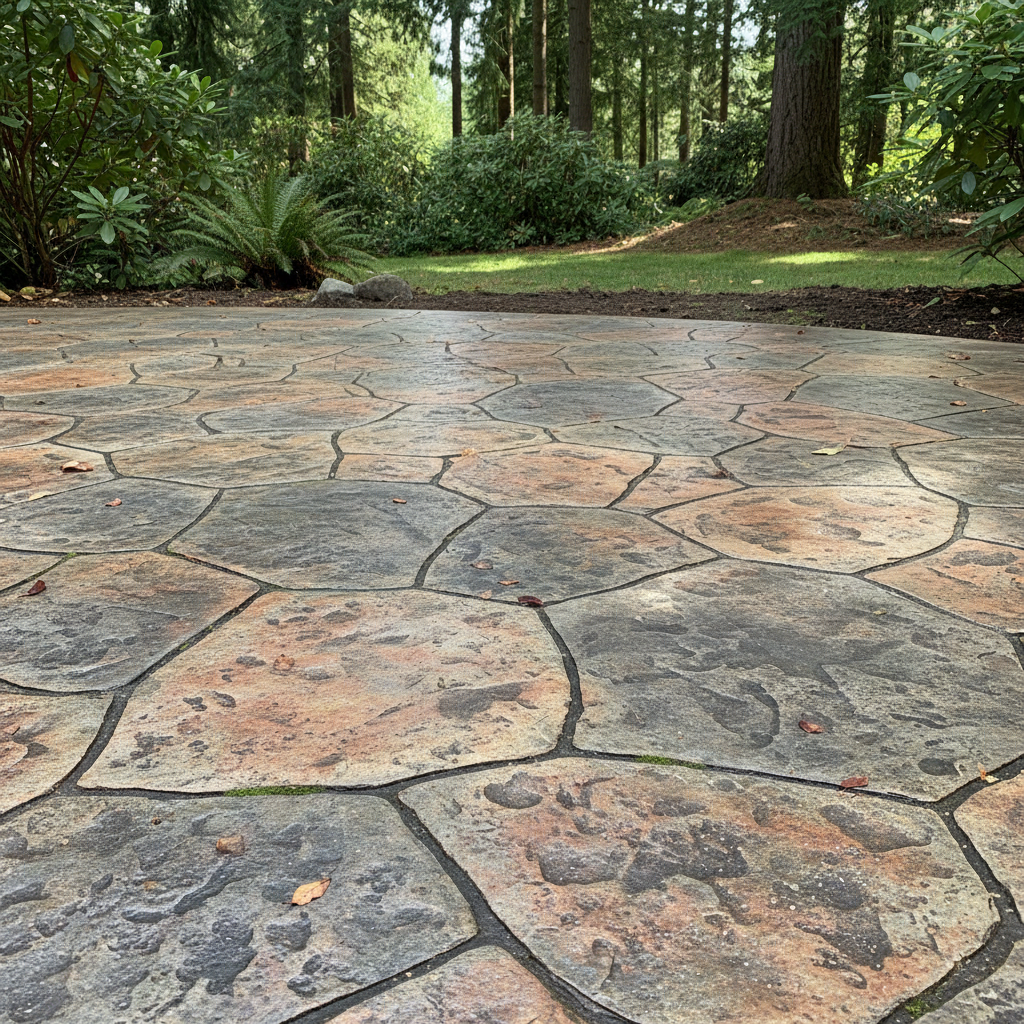
- What's your vision? Stamped concrete to mimic flagstone? A sleek, modern polished floor? Stained concrete for a unique color? There are tons of options: stamping, staining, polishing, overlays, epoxy coatings. Each has its own look, cost, and maintenance needs. Do some research, get some inspiration photos.
- Where's it going? Is this an outdoor patio, a driveway, a basement floor, or an interior living space? The location dictates the type of concrete and finish. For instance, an outdoor patio needs to handle our Bothell rain and moss, so it'll need proper drainage and a slip-resistant finish. Interior floors have different requirements for sealing and wear.
- What's the existing surface? This is huge. If you're pouring new concrete, that's one thing. If you're trying to spruce up an old, cracked slab, that's another. Sometimes, an old slab is too far gone for a simple stain or overlay. You might need to tear it out and start fresh, which adds to the cost and timeline. Don't assume you can just cover up major problems.
- DIY vs. Pro: Be Honest with Yourself. Look, I'm all for homeowners tackling projects, but concrete isn't like painting a wall. Pouring a new slab, especially a decorative one, is a big job. It involves proper grading, formwork, mixing, pouring, and finishing – all on a tight schedule before the concrete sets. Stamping requires specific tools and a lot of practice to get right. Staining can be more forgiving for smaller areas, but getting an even, professional look takes skill. Polishing? Forget about it for a DIY project; that needs specialized heavy equipment. For anything beyond a very small, simple stained patch, you're usually better off calling in a pro. You don't want to end up with a lumpy, cracked mess you have to look at every day.
During the Project: What to Expect
If you've decided to hire a pro (which, for most decorative concrete, I highly recommend), here's what should happen. If you're doing a small DIY staining project, you'll still follow some of these steps.
- Prep is Key: This can't be stressed enough. For new pours, it means proper excavation, compacting the sub-base, setting up forms correctly, and installing any rebar or mesh. For overlays or stains, it means thoroughly cleaning the existing surface, repairing cracks, and maybe grinding it down. If this step is rushed, the whole project suffers.
- The Pour and Finish: This is where the magic happens. The concrete gets poured, leveled, and then the decorative elements are applied. For stamped concrete, the crew works quickly to apply release agents and press the stamps into the setting concrete. Staining happens after the concrete has cured for a few weeks, allowing the acid or water-based stains to react properly.
- Curing Time: Don't rush this. Concrete needs time to cure and gain strength. For new pours, this means keeping it moist for several days. For stained or sealed surfaces, it means staying off it until it's fully dry and cured. Your contractor will give you specific instructions.
After the Project: Maintenance and Longevity
You've invested in this beautiful new surface; now you need to protect it.
- Sealing is Non-Negotiable: Especially here in Bothell with our wet weather. Decorative concrete needs to be sealed. This protects it from moisture, stains, UV damage, and general wear and tear. Your contractor will apply an initial sealer, but you'll need to reapply it periodically – usually every 1-3 years depending on traffic and exposure. It's like waxing your car; it keeps it looking good and performing well.
- Cleaning: Regular cleaning is simple. For outdoor surfaces, a good rinse with a hose and a mild detergent will usually do the trick. For interior floors, a damp mop with a pH-neutral cleaner is best. Avoid harsh chemicals or abrasive cleaners that can strip the sealer or damage the finish.
- Watch for Cracks: Concrete cracks. It's a fact of life, even with proper installation. Control joints are put in place to encourage cracking in specific, less noticeable lines. If you see significant cracking outside of these joints, or if cracks start to widen, it's worth getting it looked at.
- Moss and Algae: Outdoors, especially in shady spots, moss and algae can become an issue. Regular cleaning and ensuring proper drainage can help. There are also specific cleaners designed to kill and prevent moss without harming your concrete or sealer.
Decorative concrete can really transform a space. Just make sure you go into it with open eyes about the process and what's involved. If you've got questions or want to explore options for your Bothell home, give us a shout at Sunrise Concrete Solutions. We're happy to talk through your project.